FastX User Guide
What are the minimum requirements for the FastX client?
Desktop Client
- 200MB install
- 110MB RAM
- Windows 10 or higher, MAC 10.14 or higher, RHEL 7 (Debian equivalent) or higher
- 64-bit x86 Processor
Browser Client
- Web Browsers Supported (Latest versions recommended)
- Chrome (Clipboard Supported)
- Microsoft Edge (Clipboard Supported)
- Firefox
- Safari
FastX Desktop Client Getting Started
Where can I download the FastX client?
https://www.starnet.com/download/fastx-client
How to add a Connection?
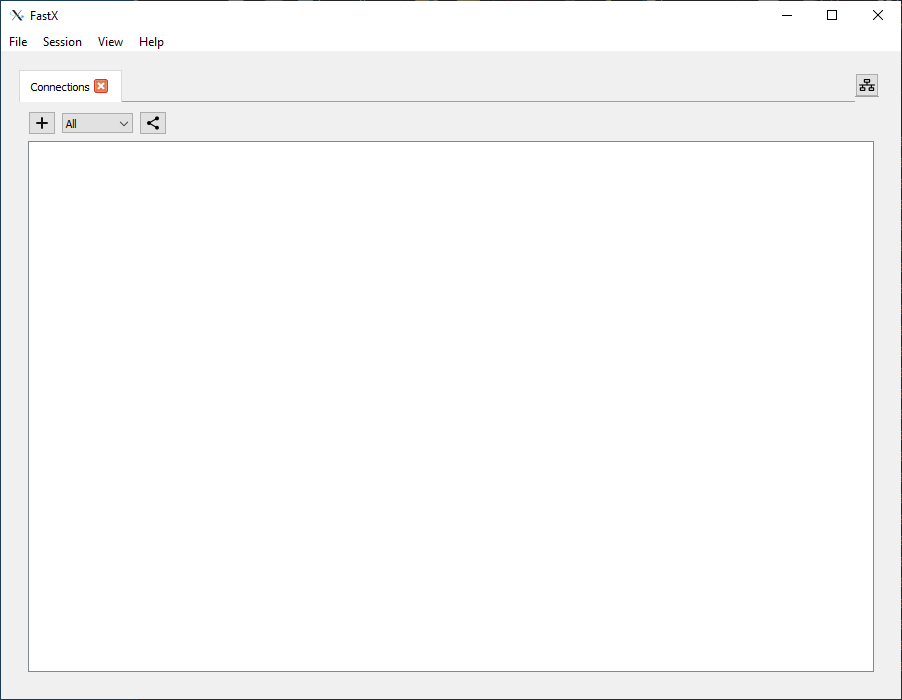
- Launching the FastX desktop client prompts the Connections window. Here you can add new Linux connections.
- Select the add icon
to add a Linux connection.

- Host – Enter the hostname or IP of the host. For example (den-fxec-04)
- User – Enter username that will be logging into the Linux host
- Port – Port number for connection (default 22)
- Name – Name of connection
How to Launch a session?
- After connecting to the server, the FastX session manager will come up and populate with current running sessions.
- Click the add icon
to launch a new session
.
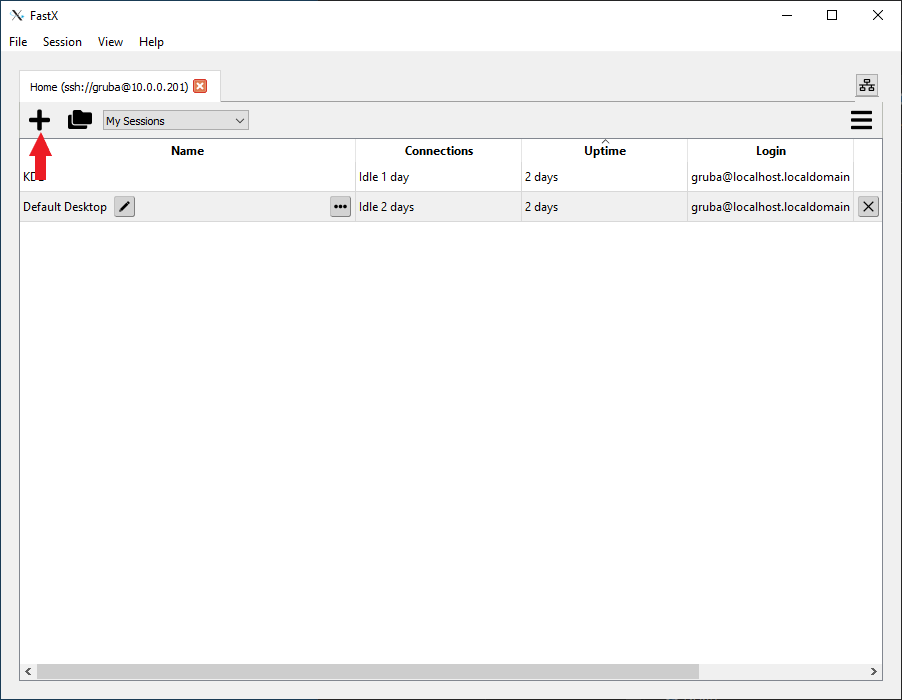
- Double click the desired session or single click the session icon and hit ok. (Default Desktop is chosen by server)

How to resize or full screen my session?
For users using a browser, please use your browser option to resize or go to full screen. For full screen across multiple monitors, check with your browser’s manual.
Desktop Client
- Resize – Move your mouse to any corner of the session and click hold and drag when the mouse cursor turns into the resize icon.
- Full screen – Move your mouse to the top center of the session just below the title bar. A drop down will appear. Select the full screen icon.

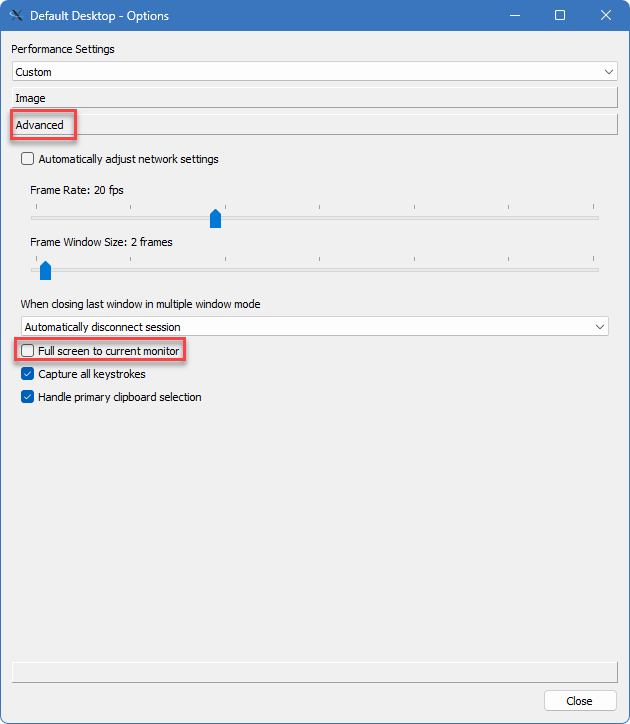
- Full screen across multiple monitors (Only available when running sessions in single window mode). Go to the Session Settings, click on the Advanced button and uncheck the box Full screen to current monitor. Then click on the full screen icon.
FastX Browser Client Getting Started
How to log into a Linux host with a browser?
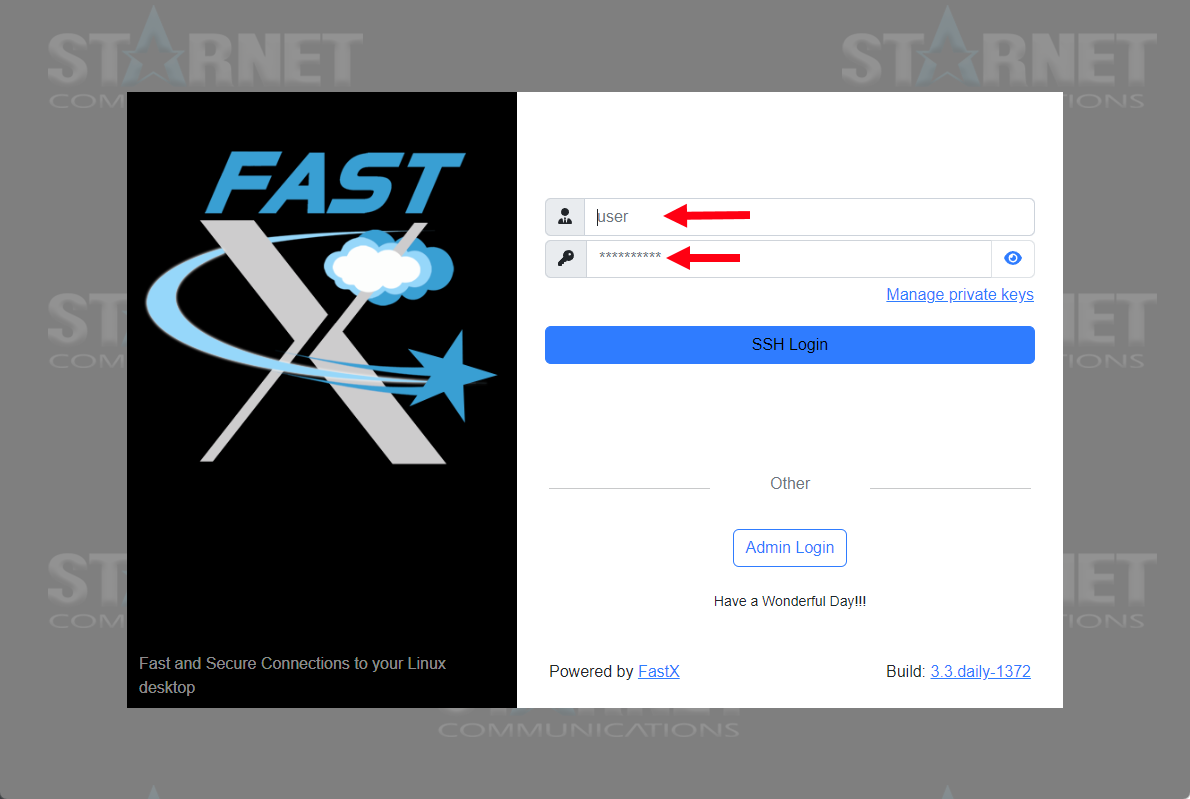
- Open up a browser and enter in the URL of the host with port :3300(For example: https://example.com:3300/)
- A login page will load. Enter your Linux username and password.
How to Launch a session?
- After logging in, you will go to a user dashboard. The dashboard consists of Applications, running and disconnect sessions, and announcements.

- Applications – Applications are preconfigured sessions that are launched by double clicking on the application.
- Connected Sessions – Session the user is currently connected to.
- Disconnected Sessions – Sessions that are disconnected from the client. Double click on the disconnected session to resume the session.
Create User Application (Custom Applications)
Users can create their own application or launch a custom application. User created applications will only be visible to the user that created them. Administrators can disable this feature by going into the Permissions options.
- Custom Applications – Launching a session that is not in the user’s applications section.
- Click on the
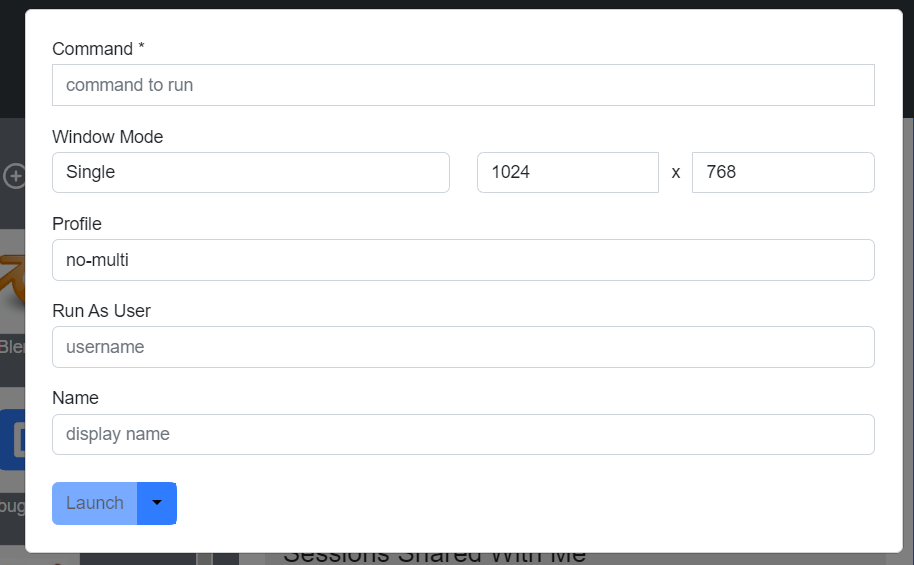
to the right of the Applications. A form will appear. Fill the form and hit the Launch button.Command (Required) – Enter command to launch the application.Window ModeSingle – Application is launched in a single windowChoose resolution (By default: 1024 x 768)
- Command (Required) – Command used to launch application
- Window Mode
- Single – Single window mode, application is launched in a single window without a window manager.
- Multiple – Application is launched in multiple window mode
- Profile – Preset setting for the launched applications. Profiles are set by administrators.
- Run as User – Username of user launching application. Leave blank if you are using the current logged in user.
- Name – Name of application.
- Launch (Button) – Click to launch application
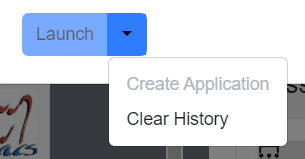
- Click on the
- Create User Application
- Click on the drop down arrow button to the right of the Launch button.
- Select Create Application
General Help
How to get to the session setting?
Desktop Client
- Launch your desktop session from the FastX Desktop Client
- Move your mouse to the top center of the session just below the title bar. A drop down will appear.
- Click on the Settings icon located in the top middle of the session (Options icons will appear as a drop down when you move your mouse to the top middle of the session)

Browser Client
- Launch your session from a browser.
- Move your mouse to the top center of the session just below the title bar. A drop down will appear.
- Click on the gear icon

How to choose a Performance Setting?
Desktop Client
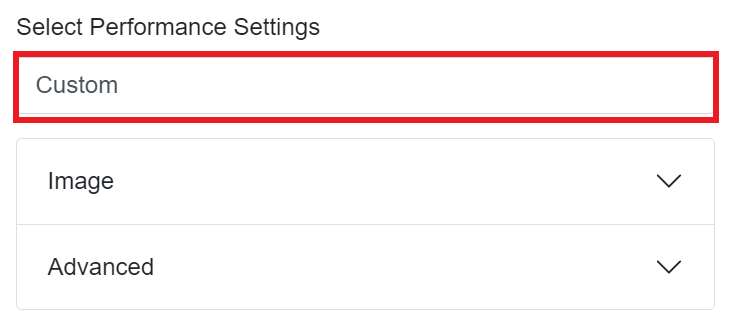
- In the Session Settings, Preconfigured Performance Settings are available by clicking on the drop down below Performance Settings. Please select the Preconfigure settings based on your needs.

Browser Client
- In the Session Settings, Preconfigured Performance Settings are available by clicking on the drop down below Performance Settings. Please select the Preconfigure settings based on your needs.
How to customize a Performance Setting?
Go to the Session Settings.
- Performance Settings are preconfigured settings that are created by admins.
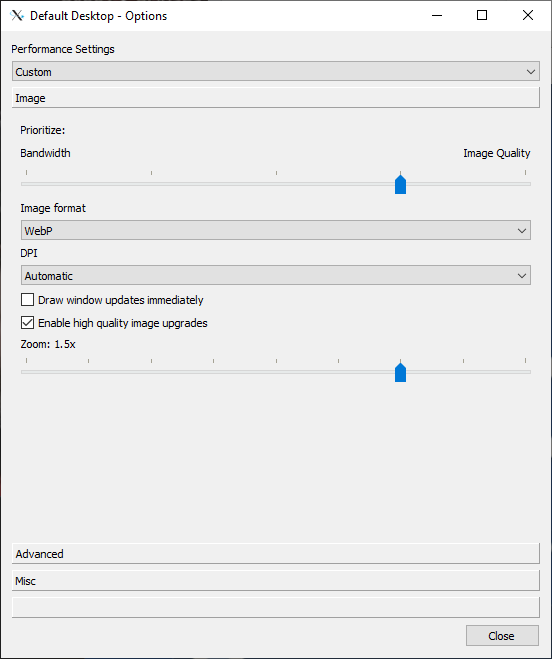
- Image (button)
- Bandwidth/Image Quality are adjusted by a slider. The slider toward Bandwidth will use less bandwidth however Image Quality will decrease. The slider to the Image Quality will increase the image quality of the session but will use more bandwidth.
- Image Format is the image format that FastX will render.
- PNG – Lossless Image Quality at any level, High BW requirements, Medium Server Work — Best for LAN and High Speed Networks
- WebP – Lowest Bandwidth Requirements, Highest Server Work, Artifacts if lower than level 5 – Best for low bandwidth needs with powerful server
- JPEG – Lowest Server Work, Medium Bandwidth, Artifacts if Lower than level 5 – Best Balance, Can often be the fastest because of the speed to compress
- DPI – Dots per inch controls the size of the text, apps, and icons. A lower DPI setting will make them appear smaller and a higher setting will make them appear bigger.
- Draw window updates immediately will immediately update the image when changed. (Generally used for debugging purposes)
- Enable high quality image upgrades – will update with a high image when bandwidth is available. May slow down session performance.
- Zoom – can be adjusted with the slider. Moving the slider to the right increases the zoom. (1.5 = 150% zoom)
- Advanced (button)
- Automatically adjust network settings will have FastX adjust network settings automatically. Provides a more snapper session experience.
- Frame Rates – sets the maximum frames per second
- Frame Window Size – sets the number of window size frames that are sent.
- When closing last window in multiple window mode – Give the user the option to disconnect or terminate the session when closing the application window.
- Prompt user how to proceed – User is prompted to to disconnect rather than terminate the session
- Continue with default behavior – Session will most likely terminate when closed
- Automatically disconnect session – Session will disconnect when closed
- Full Screen To Current Monitor (Only available in single window mode)- to full screen to current monitor when full screen is selected. Uncheck to span all monitors when full screen is selected.
- Capture All Keystrokes – Capture all keystrokes from the server. (Recommended to be checked)
- Handle primary clipboard selection – Uses primary clipboard when box is checked.
Why does the Bandwidth / Image Quality and Frame Rates change?
- Automatically adjust network settings is checked in the Advanced section. Automatically adjust network settings will auto adjust these settings based upon available bandwidth for the most efficient session environment.
- Uncheck Automatically adjust network settings to have Bandwidth / Image Quality and Frame Rates set to static.
Desktop Client

Browser Client

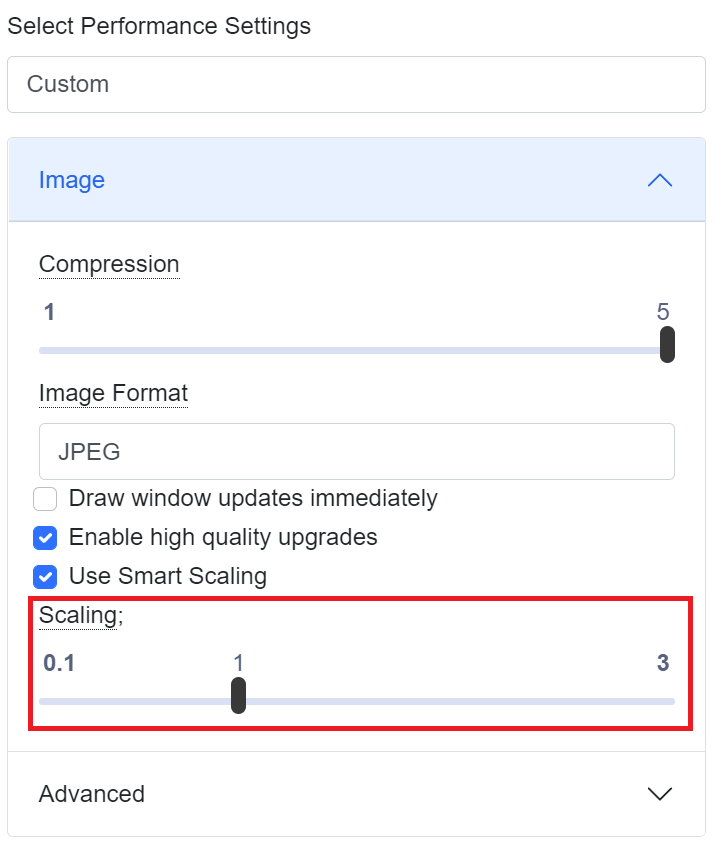
How to zoom my session?
- Click on the Image button in the Session Settings
- Under the Zoom (Scaling) option, users can be adjusted with the slider. Moving the slider to the right increases the zoom or left to lower. (1.5 = 150% zoom)
Desktop Client

Browser Client
What are the different Image formats?
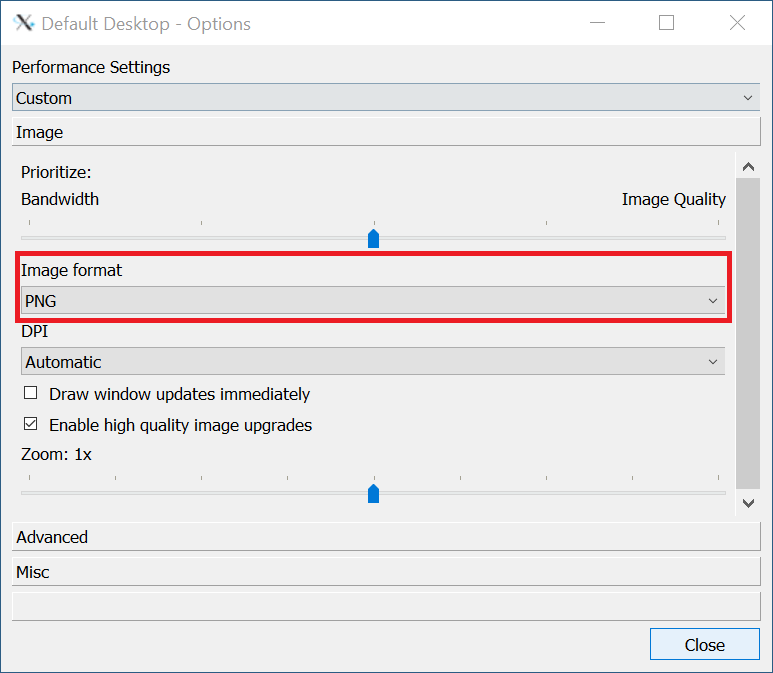
- PNG – Lossless Image Quality at any level, High BW requirements, Medium Server Work — Best for LAN and High Speed Networks
- WebP – Lowest Bandwidth Requirements, Highest Server Work, Artifacts if lower than level 5 – Best for low bandwidth needs with powerful server
- JPEG – Lowest Server Work, Medium Bandwidth, Artifacts if Lower than level 5 – Best Balance, Can often be the fastest because of the speed to compress
Why is my session slow or blurry?
This can happen when broadband is inconsistent.
Slowness
- Adjust your Image Format and your Bandwidth / Image slider.
Burriness
- In the Image category, check the box Enable high quality image upgrades. This will update the image with the highest quality when broadband is available.

- Automatically adjust is checked and is changing the image quality. Uncheck automatically adjust and increase the Image Quality.
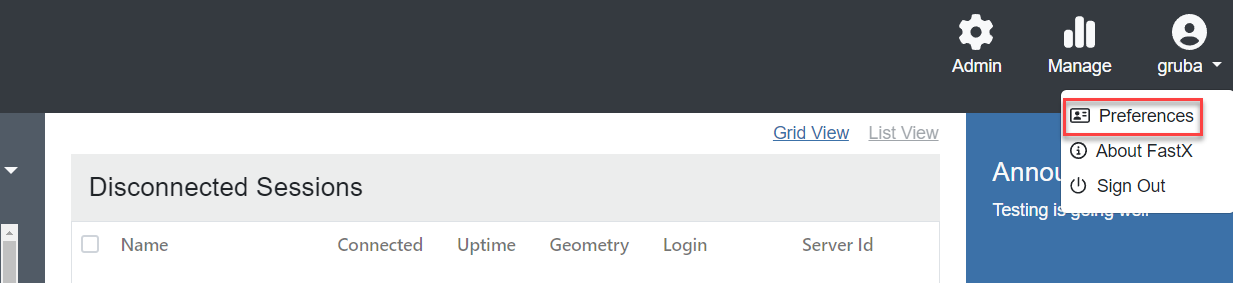
How to use the File Manager (File transfer)?
The FastX File Manager is only available through a browser
- After Login (Session Manager)
- Log into FastX via a web browser.
- Click on your username on the top right and choose Preferences
- Then click on File Manager

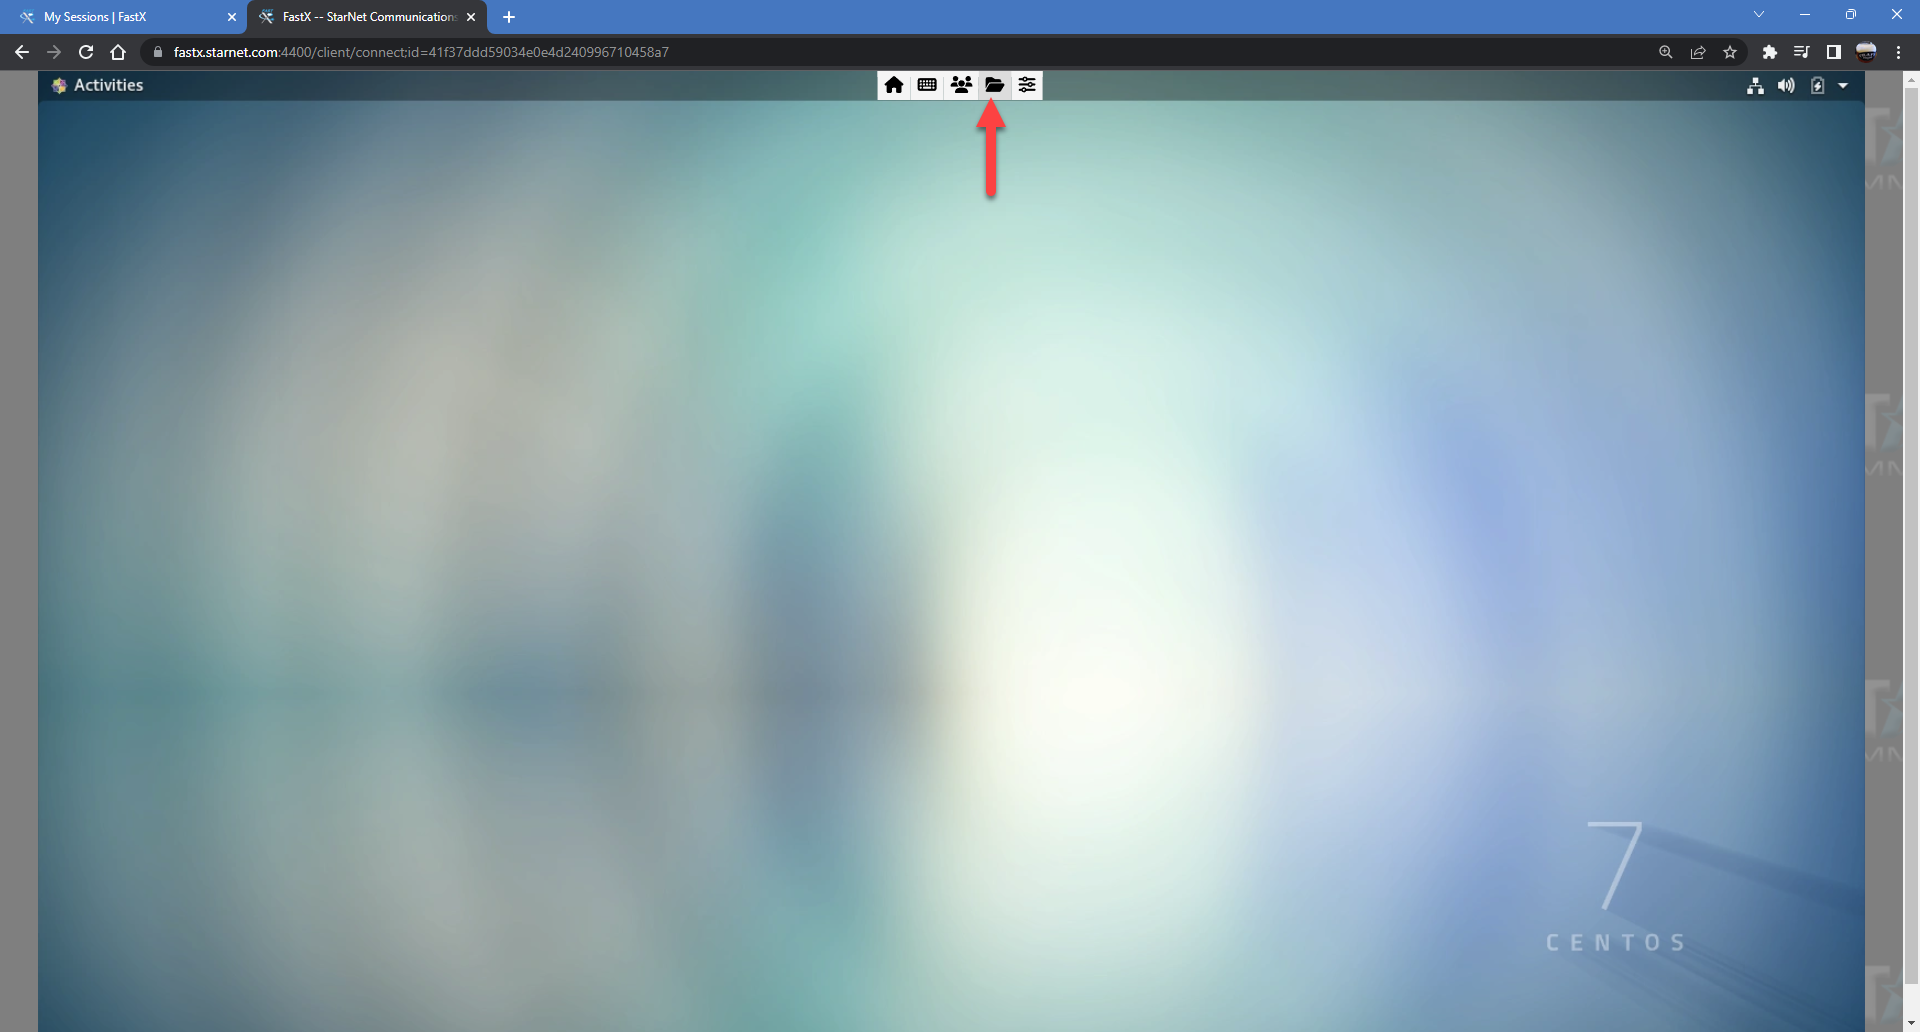
- Accessing the FIle Manager from a connected session
- Launch a session and go to the session option drop down on the top middle of the session
- Click on the File Manager icon
- Uploading
- Click on the upload icon
