FastX 4.0 Browser Client Guide
Introduction
FastX browser client connects to the FastX server through a web browser. Use the URL of the host with port 3300. (https://example.com:3300/)
System Requirements
Web Browsers Supported (Latest versions)
Ports
- Chrome
- Firefox
- Safari
- Microsoft Edge
- 3300 (https) – Default
Logging In
FastX uses the user’s Linux account to login through the browser using ssh.
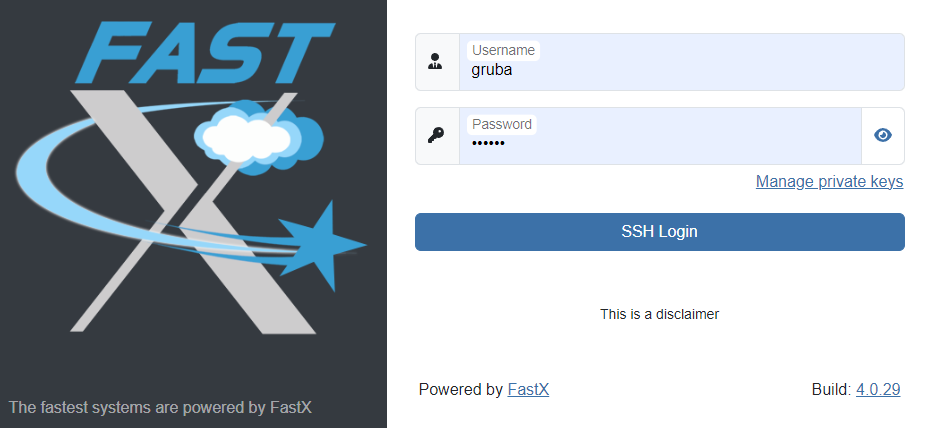
Manage private keys
Click the link to manage or add private keys for authentication.
After Login
A user’s dashboard will display.
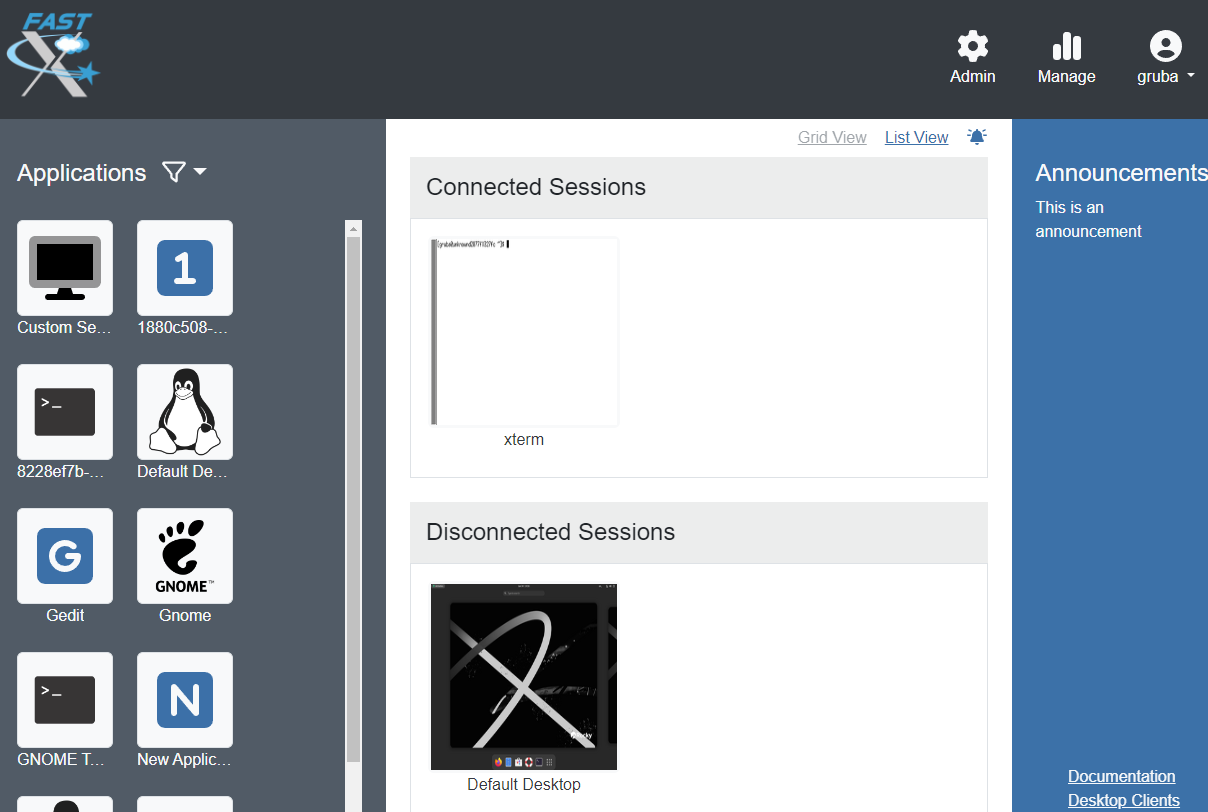
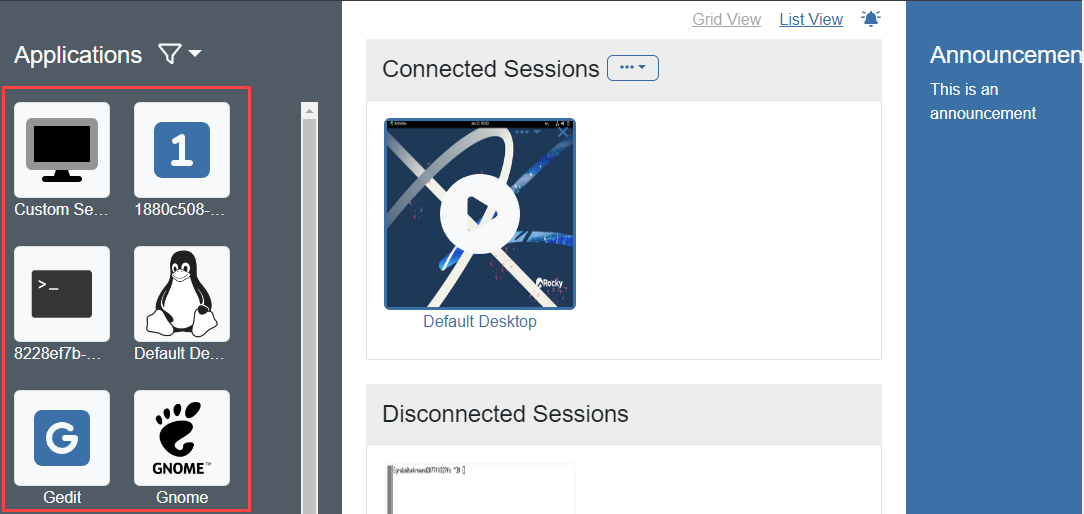
Application
Preconfigured session that will launch and render a remote Desktop or Application. (Earlier FastX version known as Bookmarks)
Launching Session
Double click on an application to launch.
Note: User’s maybe asked to choose to launch the session with either the bowser client or desktop client. This selection can be saved by check the box “Remember my selection”. If the user selects the desktop client, installation is required. Download for the desktop client is provided by the webpage by selecting the download link.

Users can change or set this setting by going into their preferences.
Admins can set this setting for users by going to the Admin settings under Users > Preferences. Users who set this setting will overwrite the Admin setting.
Custom Session
In version 4, the first application is a custom session. User double click on the Custom Session and manually input a command to launch their session.

Users can launch a custom application or create their own preconfigured applications. Created applications will only appear to the user who created the application.
- Double click on Custom Session
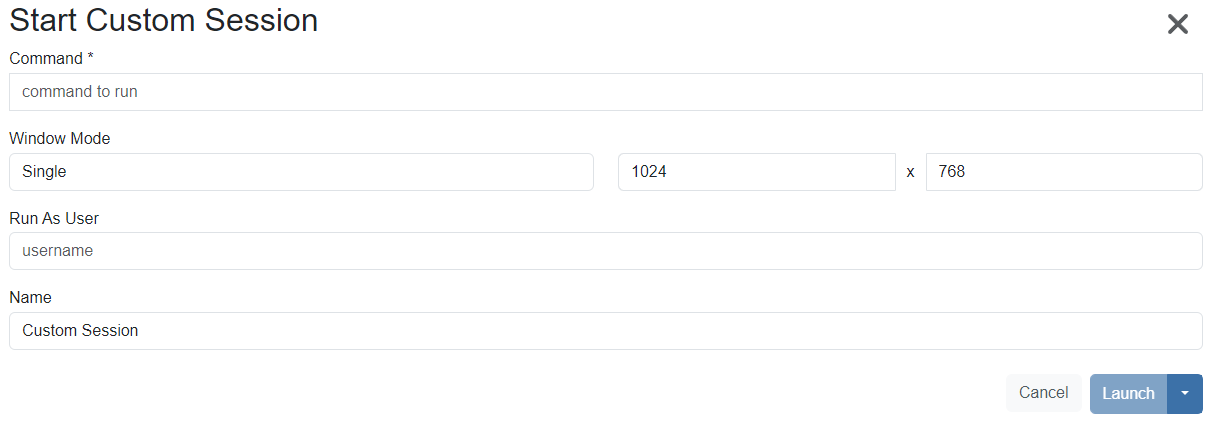
- Command (Required) – Enter the command to launch the application
- Window Mode – Window mode the application will launch in
- Single – The application will launch in a single window with desired resolution. (By default the resolution is 1024 x 768)
- Multiple – The application will launch in multiple window mode in which a new window is launched if the application requires additional windows.
- Run as User – Enter user that will be running the application. Leave blank if the current logged in user will be launching the application.
- Name – Name of application.
Create Custom Application
- Select the down arrow icon to the right of the Launch button and select Create Application.

* Note: Users can click the Launch button and this will launch the application without creating a preconfigured application.
Launched Session Options (Scaling & Rendering Quality)

After launching a session, the session option will be available. Move your mouse cursor to the top middle of the browser tab that is running the session.
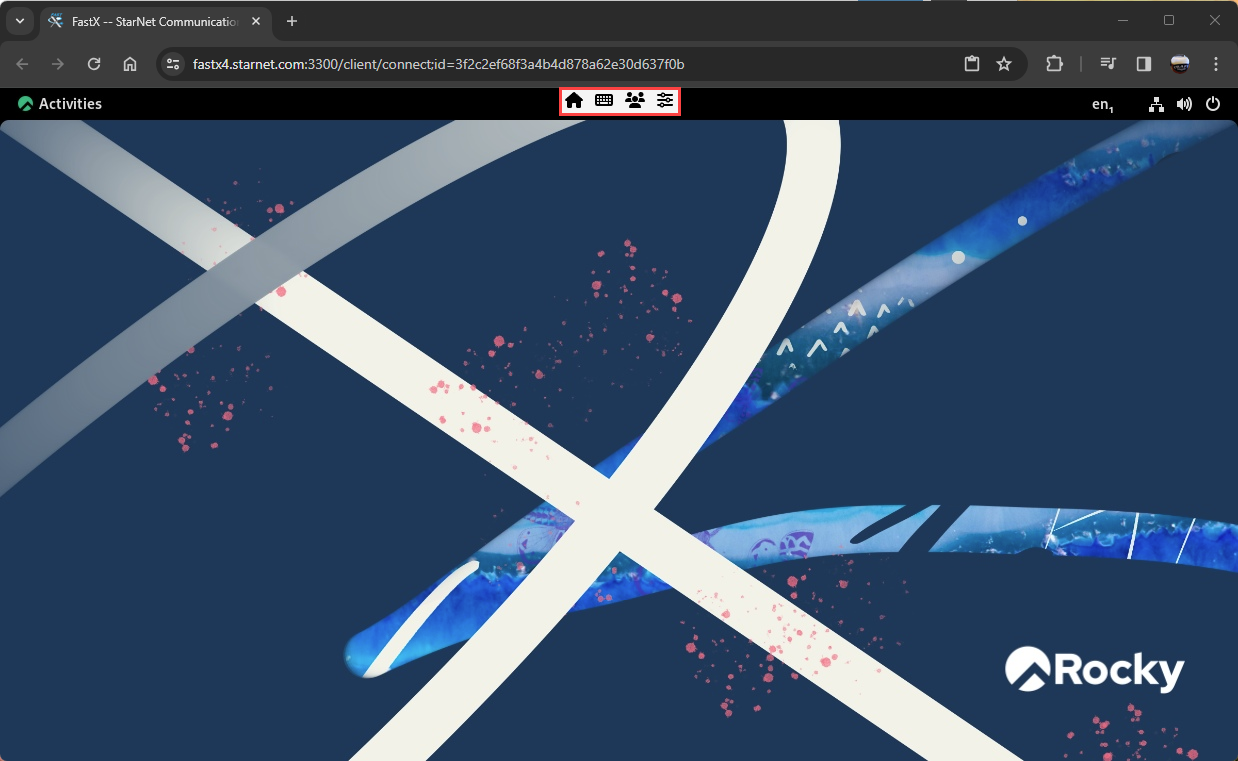
– Clicking the home icon will create a new tab that will go to the FastX user home page.
– Clicking on the keyboard icon to bring up keyboard options.
- Layout – Choose language for keyboard.
- Show Onsceen Keyboard – Check box to bring up virtual keyboard.
– Currently not available
 – Performance setting for the session
Performance Settings
Admins are pre-configure Performance by going to the Admin setting under
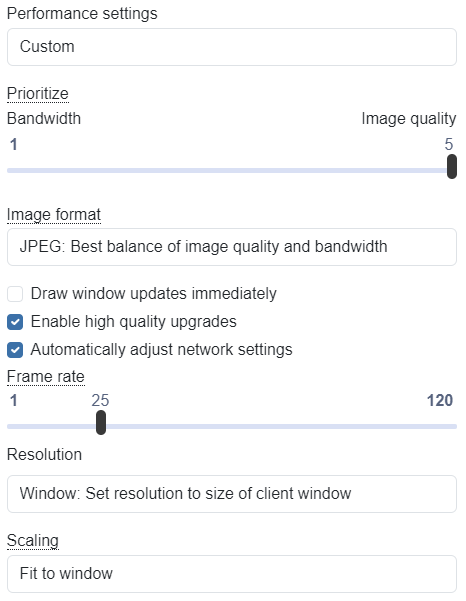
- Performance Settings are preconfigured settings that are created by admins. admins.
- Bandwidth / Image Quality is adjusted by a slider. The slider toward left will use less bandwidth however image quality will decrease. The slider to the right will increase the image quality of the session but will use more bandwidth.
- Image Format is the image format that FastX will render.
- PNG – Lossless Image Quality at any level, High BW requirements, Medium Server Work — Best for LAN and High Speed Networks
- WebP – Lowest Bandwidth Requirements, Highest Server Work, Artifacts if lower than level 5 – Best for low bandwidth needs with powerful server
- JPEG – Lowest Server Work, Medium Bandwidth, Artifacts if Lower than level 5 – Best Balance, Can often be the fastest because of the speed to compress
- Draw window updates immediately will immediately update the image when changed.
- Enable high quality image upgrades will update with a high image when bandwidth is available. May slow down session performance.
- Scaling can be adjusted with the slider. Moving the slider to the right increases the zoom. (1.5 = 150% zoom)
- Frame Rates sets the maximum frames per second
- Resolution sets the resolution of the session
- Window: Set resolution to size of client window
- Server: Keep current resolution of the server (Adjusting client window will not auto size with window)
- Select desired resolution (Adjusting client window will not auto size with window)
- Scaling sets the zoom of the session
- Fit to window – sets the zoom to the browser setting
- Select zoom based on “x”
Session Manager
The session manager displays user’s active sessions that are connected and disconnected. These sessions are located in the middle of user’s homepage.
Grid Mode / List Mode
Users can select grid mode or list mode for their active sessions.
Grid Mode
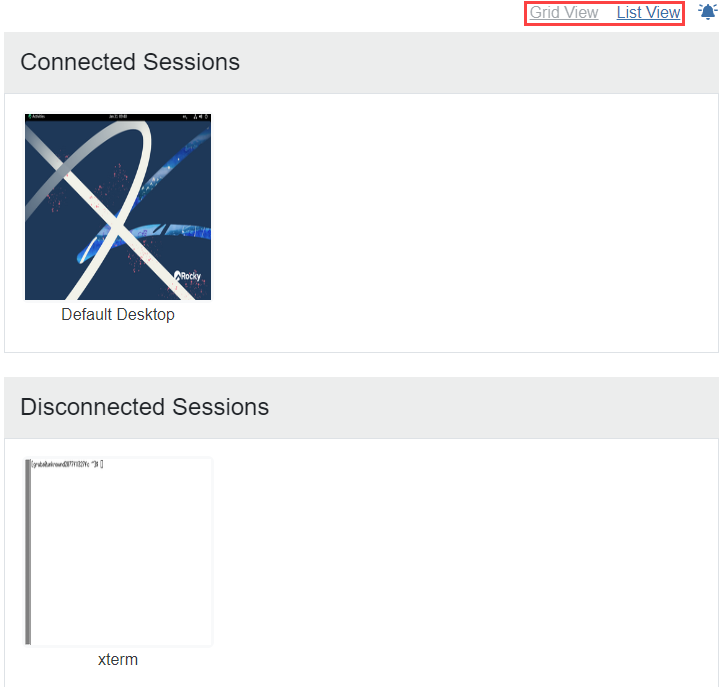
List Mode
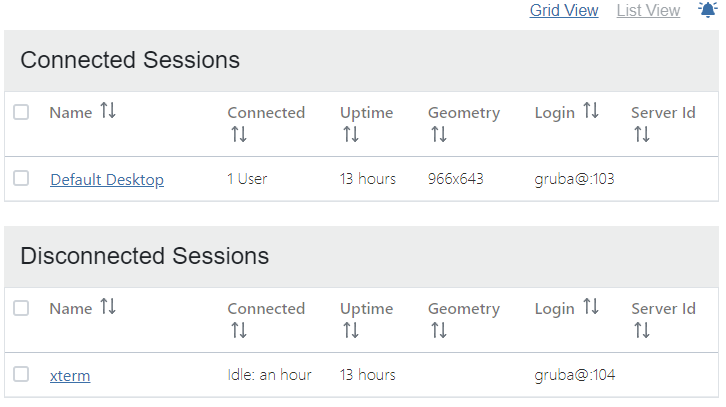
Connected Sessions
Sessions that are currently connected to by the user
Disconnected Sessions
Sessions in which the user is disconnected to the session. Note that the disconnected session is actively running on the server.
Active session options
Single click on the connected or disconnected session or check the box of the session when in list mode.
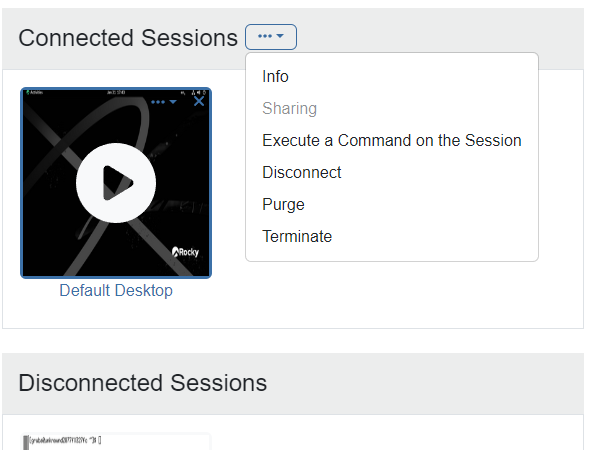
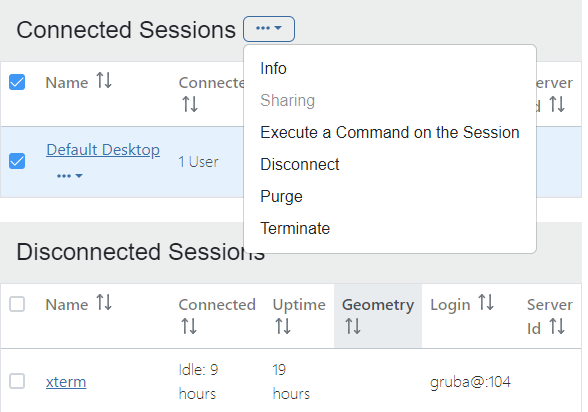
- Info – Displays information from the active session
- Session Data – Displays a list of metadata of the active session
- Logs – Logs of the active session
- monitor – Monitor log of the active session
- server – Logs from the server of the active session
- xorg – X protocol logs from the server for the active session
- Parameters – Active session parameters
- Sharing – Currently not available
- Execute a Command on the Session – Brings up a Command field to execute a command to the active session
- Disconnect – Disconnect a connected session (Session is still running on the server)
- Purge – Purge the session from the connected or disconnect list if the session is not active, but is still displayed.
- Terminate – Terminates the active session from the server.
Announcements
Announcements created by the administrator that will be displayed to all users.
Hide Announcements
Users can hide the announcements by clicking on the bell icon located to the right of the grid / list selection. Note: This setting will not save after logging out.
User Options
Click on the username on the top right to access options.

Preferences
User’s preferences with their Profile and Preferences.
Profile
User can edit their profile information
- Full Name – User name
- Connection Type – Connection used when launching an application
- User Select – User selects connection type each time the user launches an application
- Browser – Application will launch within the browser they are using
- Desktop Client – Launches the FastX desktop client when an application is launched (FastX desktop installation is required)
About FastX (FastX version info)
Pop-up window will appear with the FastX Server build, Modules used, and Documentation.
Sign Out
User Logs out of FastX